
Several of the locals (such as Brent, or Evil Homer) comment pretty frequently that they like the way the reds on many of my models look. So at the request of Brent, I decided I would try my hand at doing a write up to see if it will help some of you out there that may struggle with the color.

I picked out a genestealer model I had laying around and gave it a spray of black primer. As I stated in a few other post, I am currently using Krylon Camouflage Ultra Fine Black to prime with. The main issue with using this method for painting red or any color for that matter is that you must thin your paints. Extremely thin! Multiple layers of similar colors will be used to build up from one color to the next. Be sure and be careful that you remove some of the paint from the brush before you go to the model or it will run out all over the place. I tend to run my brush across the back of my thumb.
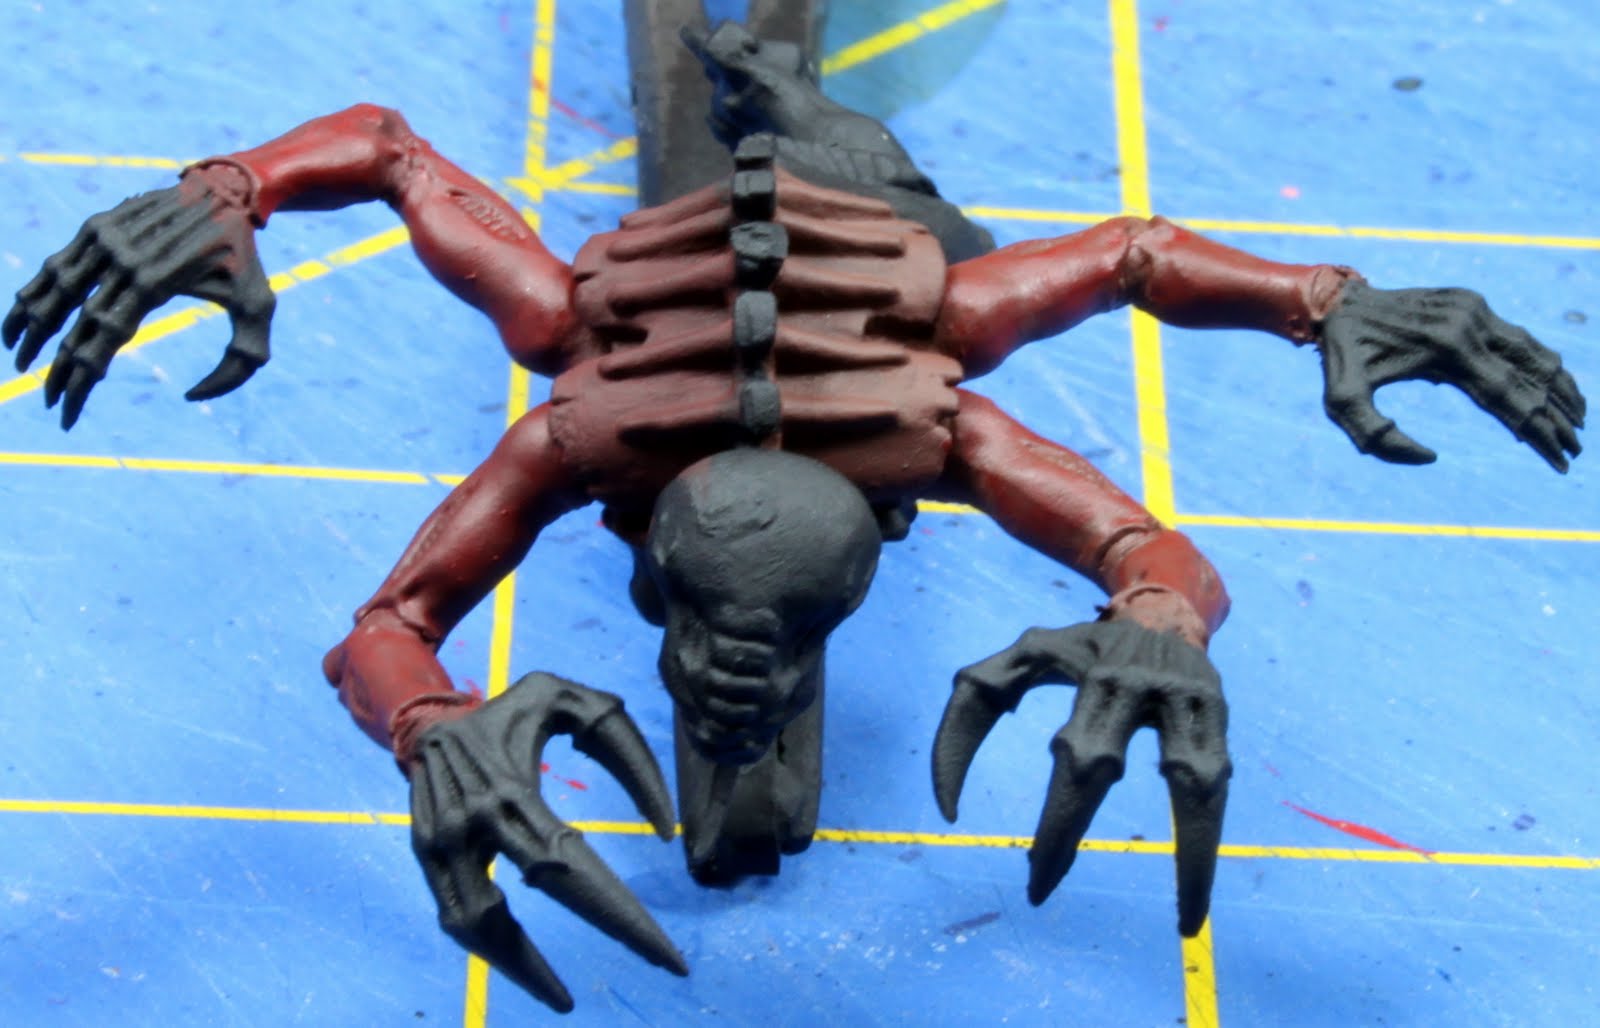
 |
| Primed and Ready for Paint |
 |
| (L)VMC 859 Black Red/(R)VMC 984 Flat Brown |
(Left) The left side was base coated in VMC 859 Black Red. I really love this color for doing red. It is a fairly dark red with out the feeling of any purple in it. It could be that for years I used to start with brown and it is a red tinted brown color. Either way, I like it. This will allow me to stay a bit darker along the way.
(Right)The right side was based in VMC 984 Flat Brown. I probably use this color more than any other color in my box. It is a good even toned brown that can be used for cloth, leather, wood, even a base for flesh if you like. This is a bit lighter than the Black Red and should help it to have a bit brighter tone at finish.

 |
| VMC 926 Red |
(Left) Since I am looking for a darker final color for the left side, I make sure and leave a some larger areas exposed in each step. This will allow the dark background to show through more.

 |
| VMC 908 Carmine |
 |
| (L) VMC 908 Carmine/ (R) VMC 909 Vermillion |
(Left) On the left side I continued with another coat of the Carmine. This will help give a richness to the color.
(Right) On the right I have now switched to Vermillion. This color is much brighter than the Carmine and has a touch of orange in it. I cover the same areas I have on the left so the tone should rise a bit.
 |
| VMC 909 Vermillion |
(Left) On the left we are starting to finish up. Concentrate on the high points and you really should not do much on the lower areas of the model. Use this color as pretty much the final highlight on this side.
(Right) Once again over the high spots. I covered a bit more than on the left and this should help the whole side look brighter when done.
 |
| VMC 909 Vermillion |
I hope this has been helpful. It can take some time to get this method down, but once you do it can be very helpful in getting some rich reds on your models. Just remember to keep the paint thin, use multiple coats, and work on successively smaller areas as your paint get lighter. The paint should do the rest for you.
1 comment:
Great article with great pics. Very helpful to see the two approaches side by side, as well as the detailed info on each paint used. Too many tuts blitz through "blend from paint x to paint y" without pics showing what each step looks like.
Post a Comment