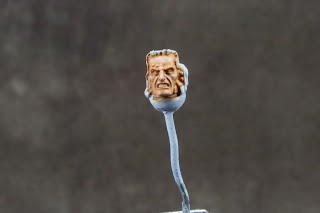
I spend a lot of time looking at others painted minis on the internet as well as in person. One of the things I think can really make a mini pop is the eyes. The face of a mini is normally a focal point and even a decently painted pair of eyes can make the difference.
Many of my friends comment on the way the eyes of my minis look. They are not spectacular in any way, but they do tend to say the right thing about the mini. So, as with all the other areas that people tell me they like about my minis I decided to do a step by step to help others who may need it with this area.
Some people I have seen start with the eyes when they work on faces. For me personally the eyes are normally one of the last things painted on a model. Since I typically use a wash on the flesh when I do the face I don't want the eyes getting covered in it. Anyway, we need somewhere to start so here I have the one decent picture from my failed faces post. This technique is fairly straight forward and does not need a lot of explanation so you may see more pictures than words here.
The first thing we do is fill in the eye as well as a small area around the eye with black paint. Don't worry too much if you cover a bit too much. You can always clean it up later. This will for the background we will paint the eyes on. You can also experiment with some darker browns as this can also look good.
Once we have a base we need to actually make the eyes. Paint a thin white line across the eyeball. Be sure to leave a bit of the black showing on the top and bottom of the eye.
What we have now is starting to look like an eyeball. Only problem is we need a pupil. There is really two ways to approach this step. You can use a dot or line. For mine I draw a straight black line from the top of the eye to the bottom. It may seem odd, but at this scale you won't really be able to tell when we are done. If you use a dot be sure to touch the top line with the dot at the least. The most important thing here is to make sure the lines are in the same place on both eyes. Otherwise your beautifully painted model will look like Sloth from "The Goonies".
Finally we need to come back in with our original flesh color as well as a well placed coverage of the same wash so we can clean up any areas we may have over covered. I hope this will help you in the future. It is the technique I have used for quite a long time now and it has always done me well.


4 comments:
That's very helpful, and looks good. I've avoided eyes to this point because I'm afraid of the results. As you mention, eyes can really make an otherwise excellent mini look pretty goofy.
Thanks for the advice, I can't tell you how many times I've ruined a paint job at the very end by botching the eyes. It's funny how tough it can be to get both eyes looking in the same direction. I've got an older Empire army composed almost entirely of Sloth wannabes. I look forward to trying out your technique, thank you!
This is how I was taught to paint eyes and I've been doing it this way for almost 10 years. I have a brush who's only purpose in life is to paint eyes - so I can be sure of it's condition and only have to worry about steadying my hand during the spurt of anxiety I get right before painting them.
"This is my crazy fianna"
hehe
Post a Comment