Well maybe I should change the title of this one. This tag team project that started
here turned into a solo project. I guess it is still a tag team project as Evil Homer cast the bricks and built the terrain. As for painting the terrain, that never came to pass. My hobby interest has been starting to wane again so I decided to do what I could to keep it going. The other day I dug out my airbrush did some work with it on an old unfinished piece of terrain. Evil Homer commented he never managed to get the terrain from the tag-team project painted so I told him I would do it.
The how and why are after the jump. Oh and lots of pictures.
As I said earlier Evil Homer was supposed to paint this but do to lack of time/motivation it was never finished. Since I have renewed my love/hate relationship with my airbrush I figured it would be a great time to get them done. See, I say love/hate because I love the effects and final product I get when using my airbrush. Unfortunately since I don't use it that often I tend to hate re-learning what I did before. Well I have been watching some airbrush vids on the net and there were a few things I think really helped me so this time it went a bit quicker. So more love...less hate.


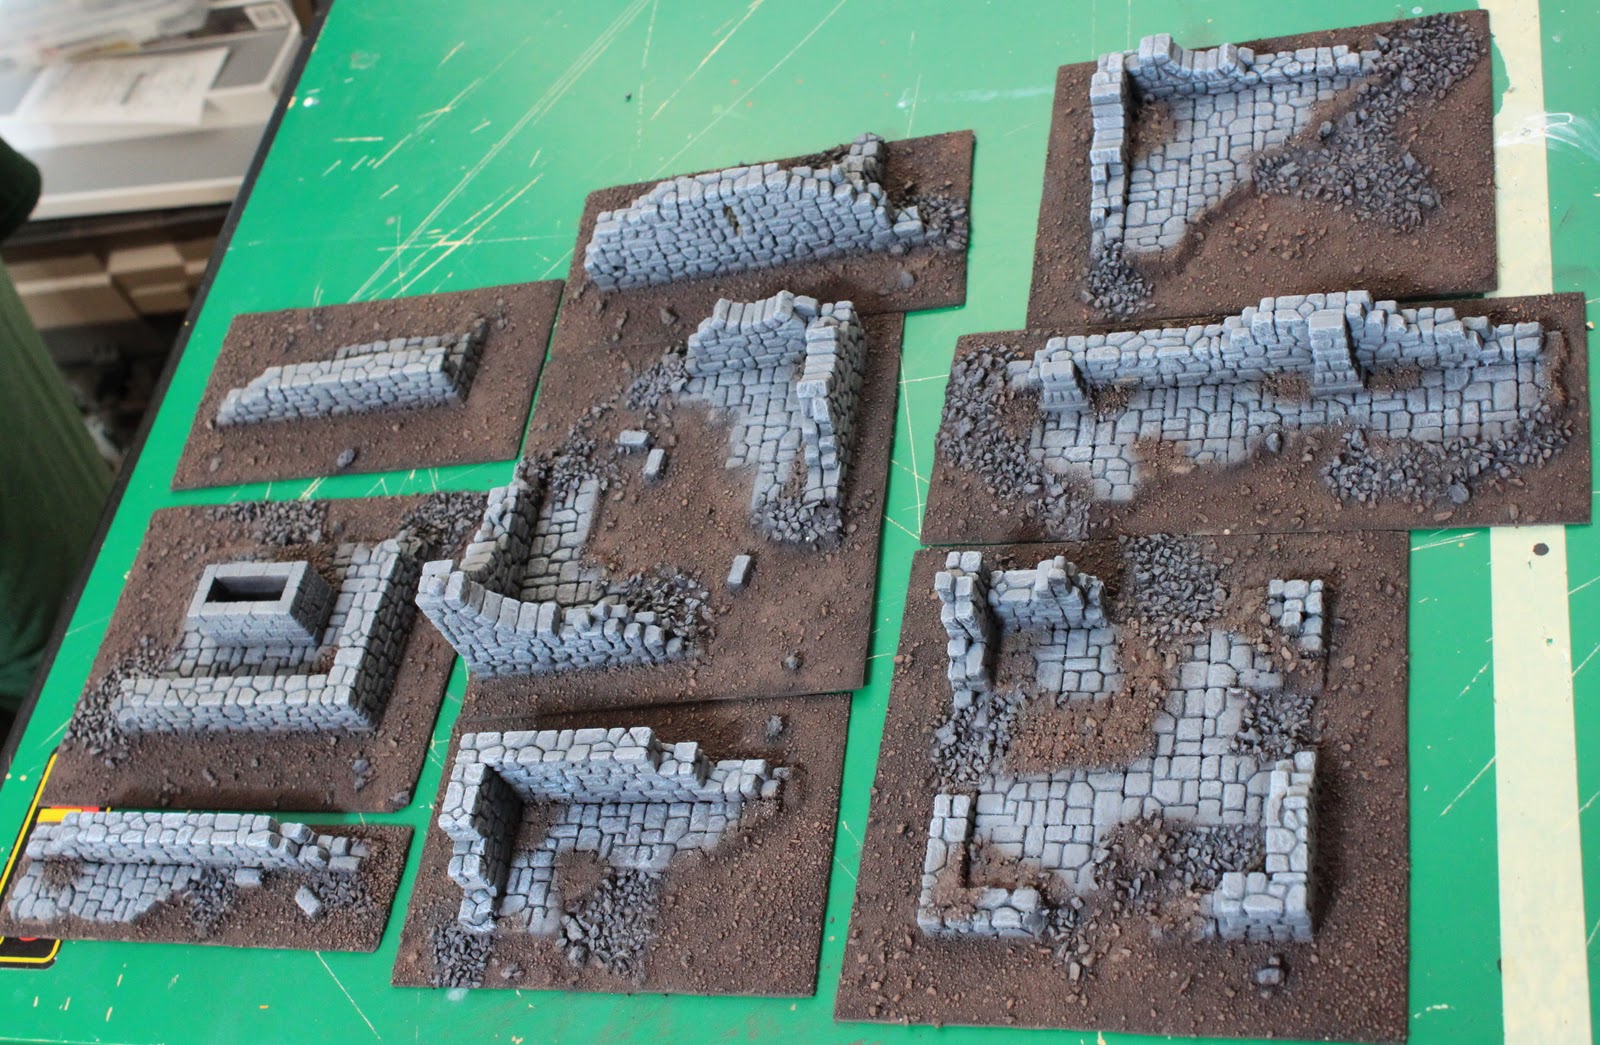
Here is what I had to start with. When I completed the sand and gravel before I sent them to Evil Homer. Well actually there is step missing here. See I know Evil Homer quite well and lets say I am not surprised that they never were painted. Knowing that, before I sent them to him I sprayed the terrain with some black spray paint. I also did some light quick coats of gray spray paint over the bricks. The primer was meant to hold the sand on a bit better and the gray was to give the terrain a bit of definition until he painted it. Unfortunately I did not take any pictures before I sent the terrain off to Evil Homer.


Here is the first base coat. As with most of my terrain I use cheap craft paints to do this work. Because of that I will not be giving any specific names. For anything you want to do just find something that looks right for you. The pictures above have only received an initial coat of a mix of burnt umber with a small amount of black. This will give me a good dark base to work from for my soil. The gray is the gray spray paint I talked about earlier. I made sure to hit the gravel and larger pebbles with this color as well. Even though they will be gray I want the area around them to match the soil.
Since these Hirst Arts bricks can be a bit difficult to spray paint into all the cracks I also came up with a good way to cover the areas in the cracks and crevices that did not get hit with the spray paint.
You can see the brown spotty areas on the cobblestones. Well that is the left over from me filling in the cracks. The paint I am using for this is quite thin so I was able to spray along some of the larger cracks to cover the white underneath. Where I over-sprayed onto the tops of the bricks I simply sprayed air only out of my airbrush to blow the majority of the paint into the cracks around it. I also did this with some of the piles of gravel. To my surprise it actually work quite well.


Once the initial coat was dry I moved on to a second color on the soil and the first on the bricks. For the soil I took the burnt umber color that I mixed with black and sprayed it straight this time. I hit all the soil but avoided the gravel. Then I took medium gray and added a touch of black to it and sprayed all the blocks. I am not worried about complete coverage here. If you miss the cracks or lower areas it is ok. It adds some randomness to the bricks and that is really what you want as natural stones have a lot of variations to them. When I sprayed the gravel/pebbles I tried to make sure and go easy so the gray did not pool up and cover the soil underneath.
The final step with the airbrush covers only the bricks. I take the medium gray I mixed with black and spray all the bricks ad gravel again. I try to concentrate on the tops of the bricks and not really hit the lower areas much. This will give it a bit of shadow/highlights. This is a pretty quick step here.
Finally I took a lighter color brown and drybrushed the soil with it. This gives it some dimension and really makes it pop. As for the bricks they were drybrushed with the medium gray. I tried to use more strokes down then up to help concentrate most of the color on top. On the ground bricks I tried to stay towards the center and leave a bit of the darker gray around the edges. After that I drybrushed one more time with medium gray mixed with a bit of sky blue. The final drybrush was concentrated to the tops of the bricks. This really picked out the texture in the Hirst Arts bricks and gave it a nice look.
So now its all painted up and hopefully soon I can tell you about the grass work. I hope you like it.


1 comment:
Using the air to blow the loose paint into the cracks is borderline genius.
I probably would have packed the paint in the corrected the overspray issues.
In the past I've used a brush to jam the paint in the cracks and then had to go back and correct issues.
Well done.
Looking forward to the green work.
Post a Comment