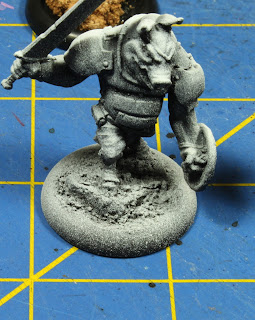
Now, when I first got mine I was a little taken back. Ok more like..."What the hell am I gonna use to fill all that space!" After spending some time thinking about it, I came up with several solutions. Some I think work well, some....not so much. BTW, I am not going into too much detail about how I did each of these designs as I have covered basing several times before. I am going to focus on what you can do and some pitfalls to avoid.
So the first thought was to just fill it with sand, or what ever basing material you like. Well there was a few problems with that. As you can see below, plenty of tacky glue and sand makes a decent looking base.
There are two problems however that you need to be aware of if you take this route. First off, that glue is gonna dry, and when it dries its gonna shrink. The pic above is not long after I applied the sand. Eventually it is gonna dry and contract leaving the sand a bit deeper. Most likely it is also gonna leave a bit of a bowl shape as the sand clings to the sides more than the middle. The other problem here is this method does not leave many options for attaching the model. Gluing to the sand is not gonna hold well and there is not much material to drill into to get extra hold.
Another route if you are lazy or just don't want to take time to do much is to just drill a hole in the base and attach the model to the base. If you want it attached fast, this is your way to go. No frills, just on the base.
One option is to find a material to build up the base. Below I have done three bases with different materials. From left to right is cork, plaster, and then VCT or vinyl composite tile. The cork is bulletin board material I got at the local office supply store. I broke out a suitable shape and glued it in place. The plaster in the middle is some I had poured into a shallow tray and broke into pieces once dry. You could easily do this with something like sculpty as well by rolling out sheets, breaking them up, and gluing them in. Finally the one on the right. Vinyl composite tile (VCT) is the stuff you see almost everywhere outside someones home. It is the 12" x 12" stuff, normally white, and often found on the floor at big box department discount stores. You can buy it by the piece at most home improvement stores.
Another idea is to fill the base with some sort of clay material. You could use green stuff or some other two part epoxy. There are also several types of air dry clay available that also work well. Below is a base done with Polyform Air no bake clay. I pressed it into the base, used the side of some cork to give it texture, then pressed the peg of my mini into the base. It is not a bad look, and it is pretty quick to do. The biggest downfall is the no back clay takes 24 hours to cure.
If you really want to get fancy you could take the time to actually sculpt details into the base. The guys from Rackham used to do that for terrain and if you can get your hands on some of their old Cry Havoc magazines there is some step by steps on how to do it. If you want something a bit more simple, take a look here at how I did some stone pavers in a similar fashion.
I tried to use a clay that required curing in the oven in place of the air dry stuff. I will give you a hint; The temperature that you need to have the oven at to cure the clay is higher than the temperature that will melt the plastic that makes the base. For short, I warped several bases before I gave up on that idea.
For my personal taste I found a combination of the above seems to do the trick. I glued in some cork or plaster. Then I packed the empty gaps with my air dry clay. Once that was dried I covered it with my sand/soil mixture to give it a bit of texture. The results are below. The last one is cork, clay, and then soil/sand painted to look like a desert type terrain.
 |
| Cork, clay, and sand |
 |
| Plaster, clay, and sand |
 |
| Cork, clay, sand painted with some static grass. |


No comments:
Post a Comment